Friday, August 28, 2026

Homesteading: Flour in Bulk

One of the first considerations a homesteader makes is how to address the family’s bread needs. Bread making can be a management-heavy task, and some homesteaders opt to skip regular sandwich bread in favor of one-off baking, but if you’re planning on having sandwich bread available, it helps to have some basic conversions.

A basic sandwich recipe uses about 550 grams of flour (mine uses 553), which means that a 50 pound bag makes roughly 40 loaves (the math divides to 41 loves, but life is imperfect, so I use 40 as a benchmark). A fifty pound bag takes up 8-10 gallons of storage space. 

If you make 3 loaves of bread each week, a fifty pound bag of flour will last about 13 weeks, or one quarter of the year, making a bulk purchase reasonable if you can accommodate the storage. I like to store things in glass whenever possible, and I promise you that even if such a thing as a ten gallon mason jar existed, it would be useless for me, since I would have nowhere to put it and wouldn’t be able to wrangle it, even empty. I have a few 2.5 gallon jars, and that’s about the maximum I can handle at a time, and about the largest that fits on the pantry shelf. I find that dividing up the bag into 4 jars and rotating them out is perfectly serviceable. 550 grams is about 1.5-2 quarts, so if you prefer, you can fill a few 2 quart containers with pre-measured flour to make the upcoming baking more streamlined. This also helps younger children (or distracted adults) and helps separate the task of weighing the ingredients from the baking.

If you only make a single loaf each week, it might make more sense to divide the purchase of a 50 pound bag with another family as opposed to storing it for most of the year (the per-pound savings are eye-popping enough to make a bulk buying group worth the time to set up). 

If you plan on storing bulk flour for longer than a few months, I strongly recommend a glass jar with a rubber ring at the seal and a spring closure. Flour is too attractive to every little pest and mite to leave this to chance, and there’s nothing sadder than opening a bag only to find it infested. (If it gets infested with weevils, put the flour in a freezer container and set it in the freezer for three days or more to kill the weevils and eggs. You can pick out or sift away the dead bugs and use the cleaned flour for baking or any of the scads of non-food uses for flour. If the flour is musty or clumpy, or shows visible mold, it’s ruined; throw it out).

You don’t have to be a homesteader to appreciate having freshly-baked bread on hand. 
The aroma alone is worth it.


Thursday, August 6, 2026

Pantry: Whole-grain Mustard


Whole-grain mustard is super simple to make and it stores for six months in the refrigerator, or so I hear; mine never lasts that long. This mustard is usually found in the gourmet aisle, and carries an eye-popping price tag that simply is not reflective of anything. There is almost no labor involved, and the ingredients are extra cheap, less than two dollars for a pint of this excellent and essential condiment. 

The flavor is perfect for ham sandwiches on homemade basic loaf bread, and it really shines on a baguette. Set a small pot on a charcuterie board.

Equipment
Immersion Blender
Two 8 ounce or one pint glass (or ceramic or stoneware) container with tight-fitting lids
Mixing bowl, about 4 cup capacity

Ingredients
1/3 cup yellow mustard seeds, whole
1/3 cup brown mustard seeds, whole
1/2-3/4 cup apple cider vinegar, depending on how tangy you like it (recipe from apple scraps)
1/2-3/4 cup water (enough to make the total liquid 1.25 cups)
1.5 Tablespoons raw sugar (or light brown sugar)
1 teaspoon salt

Directions
  1. Combine seeds in the mixing bowl and stir in water and vinegar. Let sit for 24 hours. (If you’re in a massive rush, you can reduce this to 8 hours, but the seeds won’t be as infused with the vinegar, and they won’t be as easy to mash). 
  2. Remove about 1/2 a cup of the seed mix and set aside if you want a particularly toothy blend.
  3. Add the salt and sugar and process with an immersion blender or in a food processor until relatively smooth, scraping down the sides as you go. I find pulsing the blender helps keep the blades clear. Process until desired consistency.
  4. Fold in reserved seed mix, if using.
Pour into jars and cover with tight fitting lid.
Store in the refrigerator for up to 6 months.
Flavor matures with age.

    Sunday, June 21, 2026

    Summer: Vegetable Beef Soup

    When the vegetables start coming in, there’s nothing quite like a pot of vegetable beef soup. The garden medley shines in this recipe with fresh corn and fresh green beans, and the tomatoes deepen the flavor, letting the beef flavor come through. Fresh parsley helps keep everything fresh and light.

    Everything comes together pretty quickly on the stove top; an hour of simmering and you’re ready to serve it with a hearty sourdough roll for a dinner that’s perfect for family game night or after a day out in the sun. 

    If you’re craving a bit of sunshine goodness in the middle of winter, this recipe works just as well with dried herbs and frozen vegetables and canned tomatoes. 

    Volume measurements are really just to keep things in balance. Adjust as you’d like given the amount you have on hand and what you prefer as far as flavor profile. If you like a broth soup, add more water or broth; if you like it to be more like stew, keep the liquid ratio low, and tilt the lid while simmering to help reduce the liquid further. 

    Ingredients
    1 lb. Ground beef (or stew meat, or a chuck roast cut into cubes)
    2 Tablespoons Olive oil
    1/2 Yellow onion, diced
    3 Carrots, diced
    2 stalks Celery, diced
    Half a head green cabbage, chopped (optional, but it gives it a hearty base)
    3 cloves Garlic, minced
    2 pounds Tomatoes (fresh or 28 ounces canned), chopped
    4 cups Beef Broth
    1/4 cup total Dried herbs – basil, oregano, and thyme
    Salt and pepper
    2 pounds New potatoes, chopped
    1 c Green beans, chopped
    1 c Corn, cut from the cob
    Handful Fresh parsley, chopped

    Directions
    Dab meat dry with a paper towel, then coat with salt and pepper. Set in a heavy soup pot coated with olive oil and brown over medium-high heat for about 4 minutes, turn and brown for another 4 minutes. Work in batches if necessary, depending on the size of your pan. Set beef aside once cooked.
     
    In the soup pot, sauté onion, cabbage, celery, carrots, and garlic in olive oil until onion is transparent. 
    Add broth, tomatoes, beef, and herbs and stir to combine. Add more salt and pepper to taste. Bring to a boil then reduce heat to low, cover and simmer, stirring once or twice throughout, for 30 minutes. 

    Add potatoes and green beans and simmer until everything is tender, about 30 minutes more. Add corn and parsley and simmer for another 5 minutes. Serve with sourdough rolls or crusty bread.

    Make plenty, as it stores well and the flavor is even better the next day.


    Sunday, August 31, 2025

    Garlic Vinaigrette

    A nice vinaigrette is a staple that you can whip up and have on hand all season long.

    If you love garlic as much as I do, consider this garlic apple cider vinaigrette. It stores well, mixes together beautifully, and makes use of a few simple ingredients to really shine. I especially like it on an early fall salad of baby spinach and baby kale leaves topped with dried cranberries and pumpkin or sunflower seeds. 

    You can use any variety of garlic for this recipe, and if you have specialty garlic, such as black garlic or elephant garlic, it lets the distinctive flavors come through, showcasing some of fall’s flavor queens.

    Ingredients
    ¼ cup apple cider vinegar (make your own!)
    1 garlic clove, grated
    ¼ teaspoon Dijon mustard
    ¼ teaspoon sea salt
    Freshly ground black pepper

    Directions
    Combine everything in a cruet or small carafe. 
    Shake to blend.

    Tuesday, August 12, 2025

    Pantry: Apple Cider

    Apple Cider Vinegar is useful in so many ways, and it’s perfectly simple to make at home.

    Collect apple core and scraps, such as the skin, in water. Loosely cover and store in a dark place for at least two weeks. The longer it sits, the stronger the vinegar will be. If you get a cloudy bit, that’s the mother, and it’s all to the good, as it will serve as the scraps for your next batch. Filter off the vinegar and return the mother to your fermenting crock, along with fresh scraps and water.

    Use as you would any apple cider vinegar in recipes.

    Wednesday, July 16, 2025

    Blueberry Cardamom Crisp

    blueberry cardamom crisp


    Coat a small rectangular pan with olive oil. I used an 8x10 (ish) pan.
    Mix blueberries (enough to cover the bottom of the pan) with cinnamon, cardamom, and a little vanilla.
    Put in the pan and distribute evenly in one layer.
    Cover layer with milk.

    Combine 1 c rolled oats, 1/2 c flour, 1/2 teaspoon salt, 1/2 c brown sugar in a bowl and stir with a fork. (This is probably the place to add in freshly grated or powdered ginger) Cut in 1 stick softened butter. (This was not enough oats, and should probably be at least 1.5 cups. Could probably go with two cups oats and skip the flour)
    Press oats mix on top of blueberries layer.
    Bake at 375 for 25 minutes.

    Monday, July 7, 2025

    Fruit Leather

    Who doesn't love fruit leather?
    I love it because I can slip it into my bag, eat it without any mess, and have it on hand no matter what else life throws my way. But the real magic of fruit leather is that it extends the life of those short-lived summer beauties, helping stretch the harvest over the year. Refrigerate to keep it on hand for months; freeze some to have it all year long. 

    Stay thin when spreading this, or you'll be running your oven for days before it's all dry.

    Method

    Clean and prep the fruit:
    Rinse the fruit. If you're working with stone fruit, take out the pits. Chop the fruit.

    If you're working with apples or pears, peel and core them, then chop. If working with grapes, de-stem them.

    Taste the fruit before proceeding. Note how sweet the fruit is. If very sweet (ripe Concord grapes, for example) you won't need to add any sugar. If still a little tart, you may need to add some sugar in the next step.

    Boil the fruit with water, then mash:
    Place the fruit in a large saucepan. Add 1/2 cup of water for every 4 cups of chopped fruit.

    Bring to a simmer, cover, and let cook on a low heat for 10 to 15 minutes, or until the fruit is cooked through. Uncover and stir.

    Use a potato masher to mash up the fruit in the pan.

    Add sugar and spices, if desired:
    Taste the fruit and determine how much sugar, lemon juice, or spices to add.

    If needed, add the sugar in small amounts (1 tablespoon at a time), to your desired level of sweetness.

    Add lemon juice 1 teaspoon at a time to help brighten the flavor of the fruit. Add a pinch or two of cinnamon, nutmeg, or other spices to augment the flavor, if you'd like.

    Continue to simmer and stir until any added sugar is completely dissolved and the fruit purée has thickened, another 5 or 10 (or more) minutes.

    Simple Tip!
    If you are working with grapes, strain the juice out of the mashed grapes to make grape juice. Force what is left behind through a food mill to make the purée for the next step.

    Purée the cooked fruit:
    Put the mashed fruit through a food mill or chinoise. Alternatively, purée the fruit thoroughly in a blender or food processor. The purée should be very smooth.

    Taste again and adjust the sugar/lemon/spices, if necessary.

    Pour the purée onto a lined baking sheet:
    Line a rimmed baking sheet with a sturdy, heat-proof plastic wrap (the kind that is microwave safe). Pour out the purée onto the lined baking sheet to about an 1/8 to 1/4 inch thickness.

    Slowly dry out in the oven:
    Heat the oven to 140°F.

    Place the baking sheet in the oven. Try to keep any plastic wrap from touching the sides of the oven or the oven racks. Also, try to make sure the plastic wrap hasn't folded back over on top of the purée. If this happens, the purée won't dry out.

    If you have a convection setting, use it. It will speed up the drying process. Let dry in the oven for as long as it takes for the purée to form fruit leather. We usually keep it in the oven overnight, about 8 to 12 hours.

    The fruit leather is ready when it is no longer sticky to the touch.

    Roll up in its plastic wrap to store:
    When the fruit leather is ready, you can easily peel it up from the plastic wrap.

    To store it, roll it in its plastic wrap, put it in an airtight container, and store in the refrigerator or freezer.


    Fruits and Other Add-ins
    Nearly any fruit can be made into fruit leather. You just need to be able to make it into a smooth purée to get the best results. Here are some suggestions to get you started:

    Berries - like strawberries, blueberries, raspberries, blackberries
    Stone fruits - e.g. apricots, plum, peaches
    Tropical fruits - like mangos and papaya
    Other fruits - like apples, pears, kiwi, grapes
    Sweetening Fruit Leather
    The nice thing about fruit leather is that you don't need to add sugar or lemon to preserve the fruit. The process of removing the moisture is what preserves the fruit. You can add sugar to balance out the flavor if needed, but you can also use other sweeteners (honey, agave, maple syrup, and the like).

    We suggest adding lemon not only to brighten the flavor, but the citric acid helps preserve the color of some fruits.

    How Long Does Fruit Leather Last?
    You can easily store fruit leather, rolled up and placed in a large lidded jar or zip-top bag at room temperature for up to 1 month. For longer storage (up to 6 months), refrigerate your fruit leather. For even longer storage (up to 1 year), you can freeze your homemade treats.

    Alternatives to Plastic Wrap
    If you don't want to use plastic wrap, you can line your baking tray with parchment or a silicone mat.
    The quality of the plastic wrap itself has a lot to do with safely cooking with it.
    Be sure not to use wax paper, since wax melts when heated.
    Fruit Leather in a Dehydrator
    Got a dehydrator? Lucky you! Follow the recipe up to Step 4. Then pour out onto the fruit leather tray of your dehydrator (if your machine came with one). You can also cut out parchment paper to size, and line the trays of your dehydrator.

    Set your dehydrator to 140°F (60°C) and let it do its magic for at least 6 or up to 12 hours. The actual time will depend on the type of fruit you're using and the thickness of your leather. But we've found that 8 to 10 hours is the sweet range for making fruit leather in our dehydrator.

    Check your fruit occasionally. The fruit leather is done when it's dried and not sticky to the touch.

    Wednesday, April 2, 2025

    Short Crust Pastry

    I love a good crust, and this comes together quickly enough that there's no need to buy a store-made one (though there's nothing wrong with them, of course). 

    I highly recommend weighing the flour in this recipe, though if you don't have a scale, a heaping cup will usually be close enough. This is an excellent crust for using in all manner of tarts, and makes an especially nice quiche or pot pie crust.

    You can use a food processor or stand mixer, but I find the best results come from using a basic pastry blender. 

    Ingredients

    145g (about 1 1/4 cups) all purpose flour (weighing will give you the best results)
    1 stick ice cold butter cut in small pieces
    1/4 cup ice cold water

    Directions

    1. Pulse flour and salt with pastry blender.
    2. Add butter, pulsing until flour feels like it has small pebbles. Don't overblend, as the butter bits help keep the crust tender. 
    3. Slowly add water until mixture comes together and feels like clay.
    4. Knead dough 2 or 3 times on a lightly floured surface.
    5. Roll into a disc about 12 inches in circumference.
    6. Place over a 9.5 inch tart pan, letting it fall into the middle.
    7. Trim to just outside the circumferance of the pan, folding the excess inside to make a double thickness.

    If blind baking, set weights onto crust and bake at 425 for ten minutes.

    Monday, March 31, 2025

    Small Batch Baked Oatmeal

    I love this all year.

    I'm not a huge fan of oatmeal cooked on the stovetop -- I can't seem to really get with the consistency, something that makes overnight oats even worse. But I like oatmeal bars, and I love how easy it is to cut the baked oatmeal into squares that I can wrap up and take with me hiking or on road trips or to work. They are great on their own, and they make a fantastic addition to yogurt, with or without fruit. 

    Ingredients

    1 cups old-fashioned rolled oats (do not use quick oats--they get mushy)
    ¼ cup  lightly packed brown sugar 
    ½ teaspoons baking powder
    ¼  teaspoon salt
    ½  cups dairy or non-dairy milk
    1 egg (small or medium eggs are fine here)
    ½  teaspoon vanilla extract
    2 tablespoons melted butter or oil 
    Toppings: additional milk, berries, sliced bananas, chopped nuts, etc

    Spices and Variantions: I like to use whatever is in season. Follow your heart. 
    Mix any spices into the dry mix, and add the fruit to the pan just before baking.
    Yes, you can add chocolate chips.
    • My absolute go-to is cinnamon and a diced apple.  
    • Blueberry lemon is like sunshine.
    • Cherry with extra vanilla is lovely, or your could use vanilla powder
    • Pear and cardamom is amazing
    • Peach and ginger capture late-summer in a pan.   
    • For Mexican Mocha Oat Bars, add cinnamon, cocoa powder, and just a few grains of cayenne to the dry mix, and add a tablespoon (or more, as you like) espresso or coffee to the milk, making sure it stays at half a cup. You could even substitute coffee for the milk if you'd like. Increase the brown sugar if you'd like; it will balance the cocoa and help the cayenne bloom.


    Directions

    Mix dry ingredients together in a bowl.
    Mix remaining wet ingredients in a separate bowl, including the egg, and whisk together, then pour into dry ingredients and stir to mix.
    Pour into a small baking dish that has been greased with oil or butter. (Mine was a rectangle dish, roughly 7x4.5 inches, but you can use a 6” ramekin, or a couple small dishes, or whatever makes sense.)

    Bake at 350 for 25-30 minutes, until golden brown.

    Let the dish cool before cutting.
    Wrap and store in the fridge for several days; up to a week (if they ever really last that long). 

    Wednesday, March 19, 2025

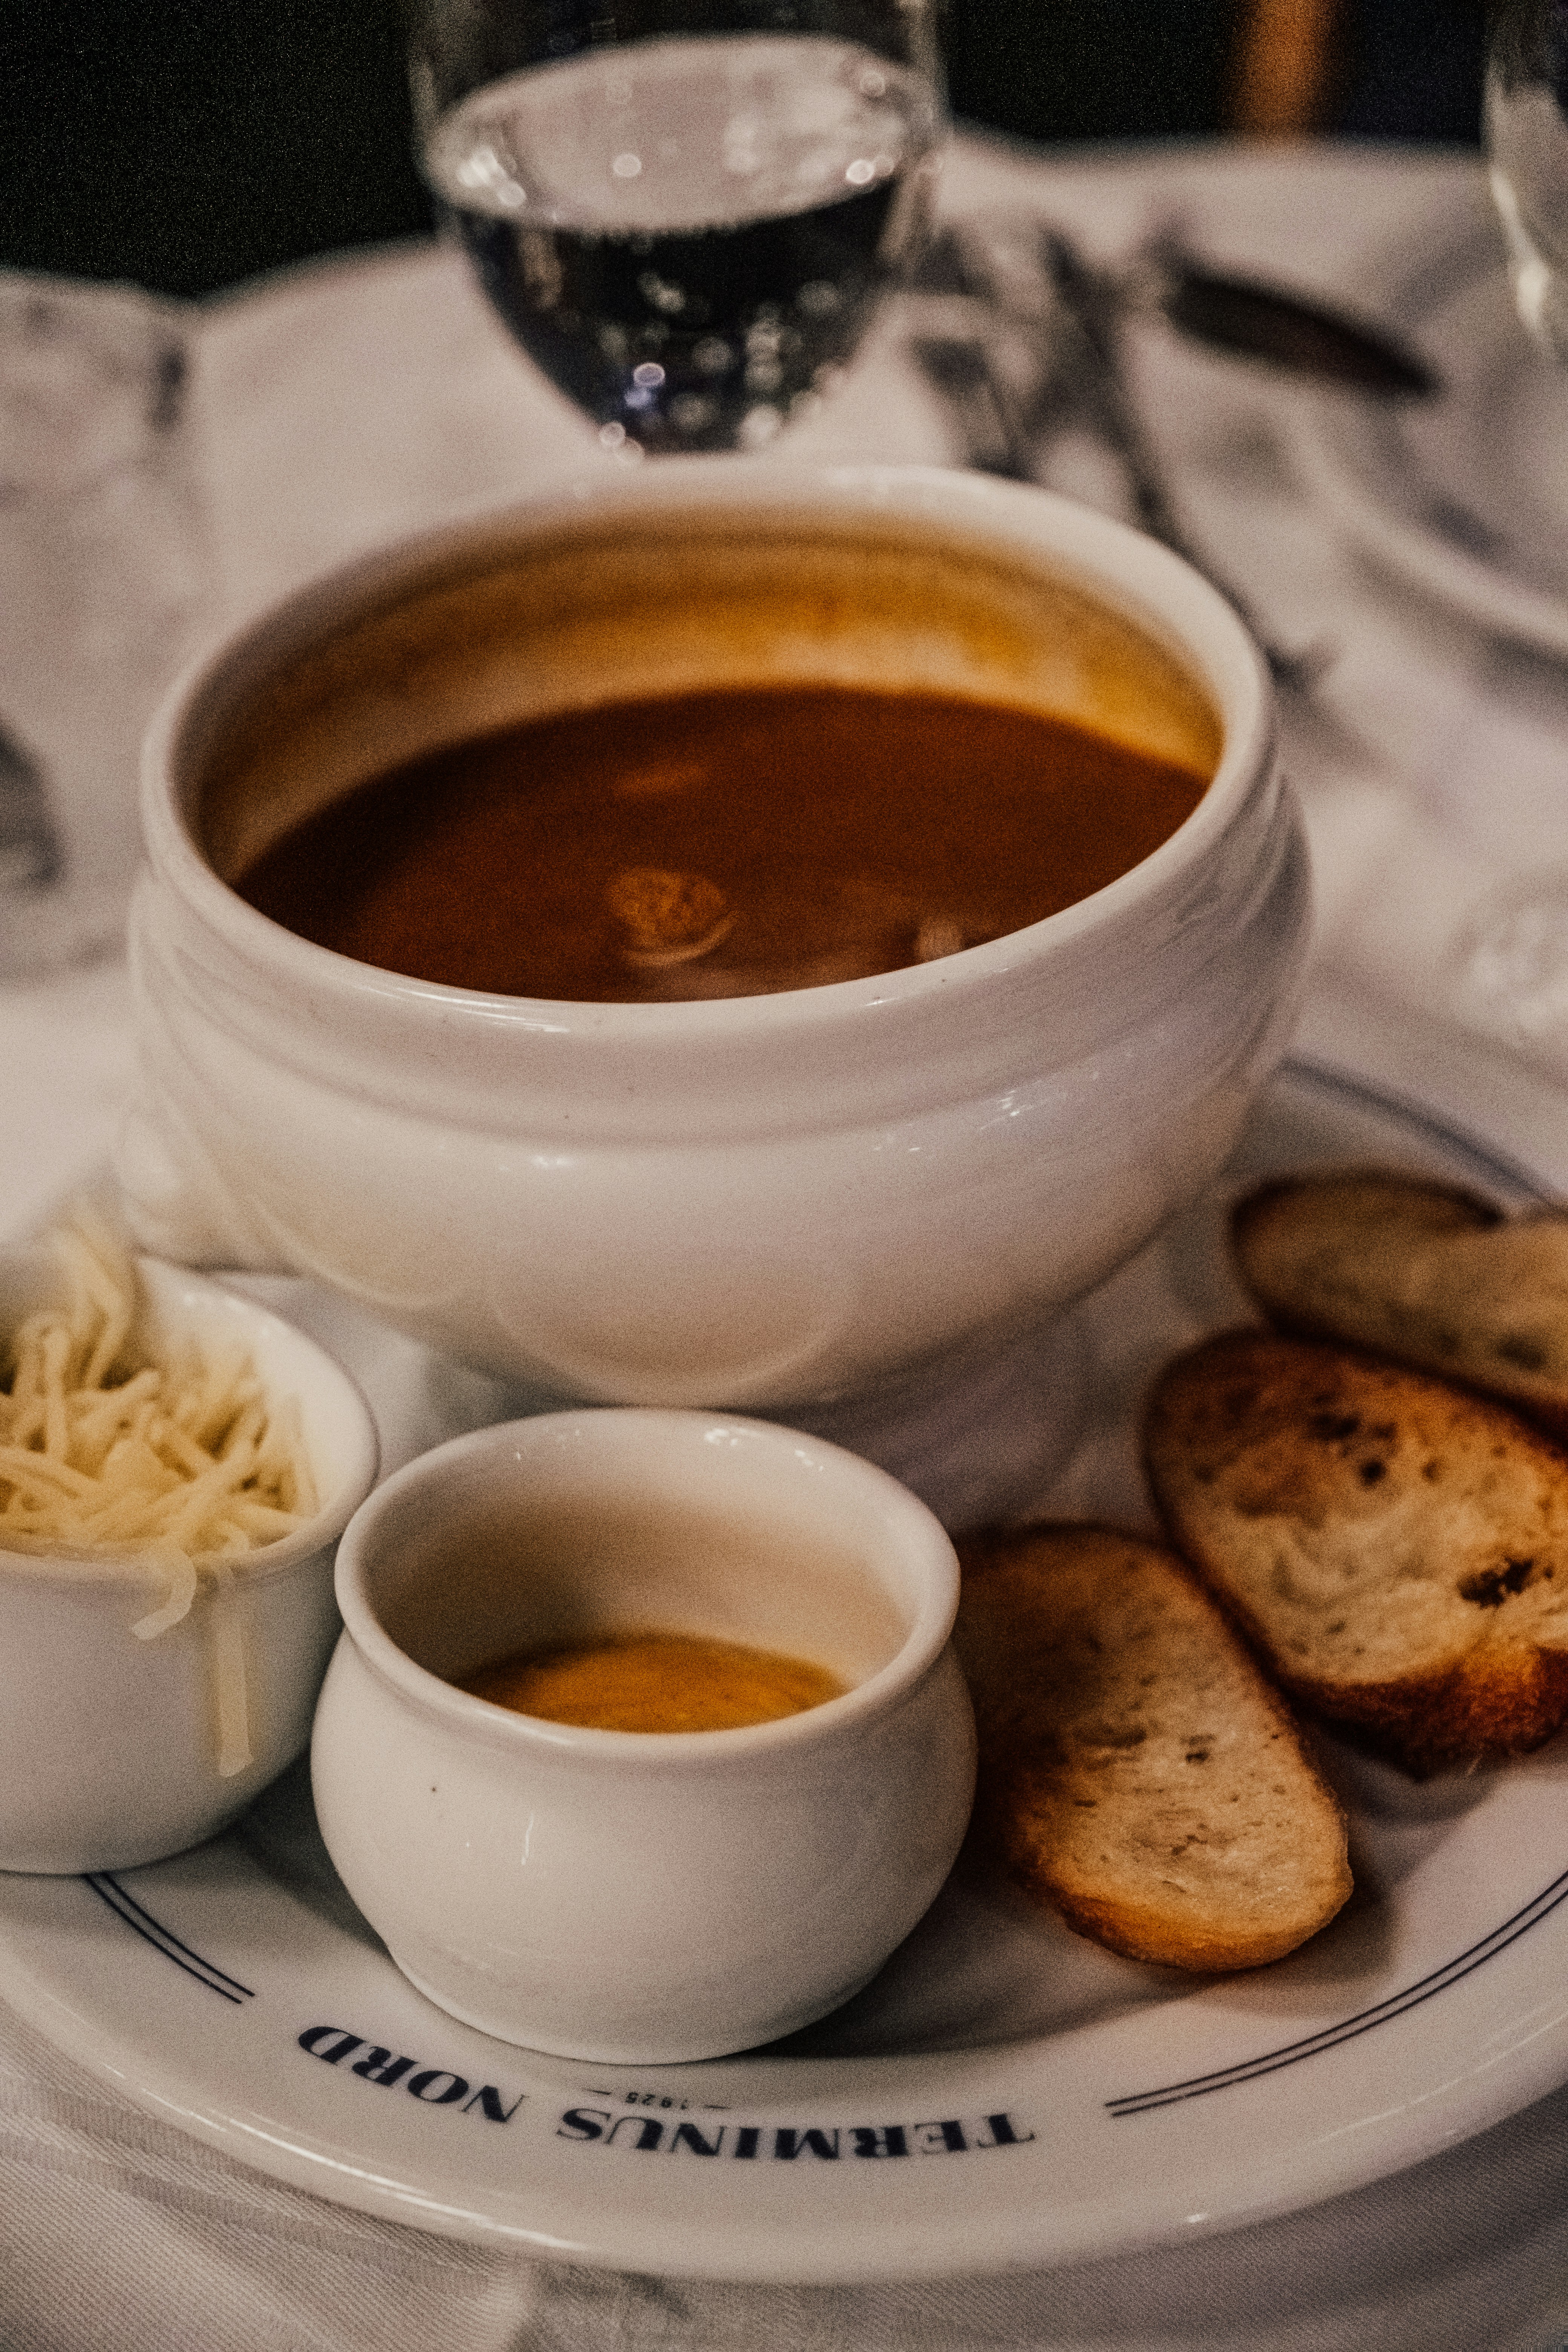
    Classic French Onion Soup

    There's something about a bowl of French Onion Soup that feels like a healing spell for the soul, especially after a long winter. 

    By the time the first shoots of green are coming up, the idea of "fresh vegetables" is getting a little thin. Likely even the last of the winter squash are gone, and the only thing that remains are potatoes and onions. Here's a classic recipe for French Onion Soup which will make the most of the onions that still linger, and warm your soul in the process. Bonus for using yesterday's bread, which is the perfect texture for topping a bowl of soup. 

    Caramelize the Onions

    French Onion soup is more of a process than a recipe, and it starts with the onion.
    Caramelized onions are great in so many dishes, including quiche or focaccia, and as a topping to burgers, grilled cheese sandwiches, or on a BLT. Put them on anything and everything. Your friends will think you are gourmet, and your taste buds will love you for it. And really, if couldn't be simpler. It takes some time, but you can absolutely caramelize onions in advance and keep them in the fridge for a few days. They'll keep in the fridge for up to four days, so this makes them an excellent weekend cooking task. 

    The best onions to use are sweet ones, like Walla Walla or Vidalia, but you can mix it up with sweet and yellow onions. If all you have the the old yellow standby, just add a splash of balsamic vinegar ot a pinch of brown sugar after the onions have caramelized. 

    Slice the onions thinly and add them with a pinch of salt to the pot on top of the melted butter. Start on medium heat, then lower it. Gentle heat is what allows the caramelization to happen. The whole process will take 45 minutes to an hour depending on your stove and the amount of onions you're cooking. If you're using a skillet, tongs make the turning process easiest. You want to be able to turn them so that they cook evenly. Once they start to soften and turn golden brown, lower the heat. If the onions are sticking at all, add a splash of balsamic vinegar to deglaze the pan. Continue stirring over low heat until the onions are the color you want. If you're using the onions in soup, add a splash of broth at the end to pick up all the browned bits and deepen the flavor.

    Broth

    Beef stock or broth is the hearty base to this recipe, and what makes it stand out. You can use vegetable or chicken stock, just be aware that it will change the flavor profile a bit. If you are making your broth from scratch, this is the perfect way to use it. You can add some red wine or sherry to the soup pot after you pour in the broth to give it that classic French Onion Soup taste. The alcohol will cook out.

    Pour the broth over the onions and bring to a vigorous simmer, covered, for 10-20 minutes, stirring as needed. When the soup darkens and the aroma fills the kitchen, it ready. Slow cooker note: The caramelized onions can be placed in a slow cooker with the broth and heated on low for 8-10 hours or high for 4-6 hours.

    To serve, ladle the soup into ramekins, bowls, or mugs, filling halfway to two-thirds. Add a piece of crusty bread on top and cover with thinly sliced cheese. I like Gruyere cheese here. Bake in a 425 degree oven for about 10 minutes, until the cheese is melted and slightly browned. Serve with milk and more bread.

    Ingredients

    1/4 c. butter, melted*
    2-3 onions
    Pinch of salt
    Balsamic vinegar
    4-6 c. broth
    Swiss cheese, sliced thinly

    *You can use 3-4 Tablespoons oil instead. I like to use a high quality olive oil if I'm going that route. You can also go half and half on butter and oil (or any ratio you like). 


    Tuesday, March 18, 2025

    Pantry Goodness: Dry Onion Soup Mix


    I love being able to whip up a batch of prepared seasoning mixes that simplify recipes and make busy days manageable. Of course we can always spend time adding single ingredients but some dishes call for a particular flacvor profile that you want to be able to provide reliably. 

    Dry Onion Soup Mix is one of those ubiquitous ingredients in a whole plethora of recipes. If you're trying to avoid preservatives (I'm looking at you, MSG!) or sodium, though, it can pack a heavy punch. And of course the cost per serving of a homemade batch is wildly less. My favorite part is being able to use organic ingredients, or even to use ingredients I've dehydrated or powdered myself. 

    Mix up a batch of this (or a half batch, or a quarter batch) and store it in the pantry to give a boost to soups and stews. I particularly like it for cooking stew beef in the crock pot. Add one ounce of mix, 2-3 pounds of stew meat, and one stick of butter to the crock pot. Cook on high for 4 hours or on low for 8. Serve over egg noodles or the grain of your choice for some can't-be-beat comfort fare any day of the week, and any season.

    Ingredients

    1 cup dried onion flakes
    8 tablespoons beef bouillon powder or granules* 
        (my favorite is Frontier Organics No-Beef Broth Powder)
    1 teaspoon onion powder
    1 teaspoon parsley flakes
    ½ teaspoon celery seed
    ½ teaspoon paprika
    ½ teaspoon ground black pepper

    *You can also use low-sodium bullion here to help keep sodium in check.

    Directions

    Combine ingredients in a bowl and mix with a fork until well combined. 
    Store in a glass container in the pantry in a space that less likely to be humid.

    Use

    The typical dry onion soup mix pouch is 1 oz. 
    I recommend using a scale, but really it's fine to make a best-guess. 

    Thursday, February 6, 2025

    Golden Noodle Soup

    This soup has a whole serving of vitamin-and-mineral-goodness to help you recover from whatever is ailing you, including just overdoing it at the gym. It’s especially good during germs season. This is a minimalist soup so that you can make it without too much fuss or bother using things that are likely on hand when you or your loved ones aren’t feeling well. Ready in about 30 minutes.

    For additional tonic and immune-boosting, add in some ginger with the garlic and onion, and a hint of cayenne along with the turmeric.

    You can use any noodle or pasta, here. Use rice noodles for a gluten free version, or wide egg noodles for an American classic. Add miso and soy sauce for the bullion for a more Asian flavor palate, or chicken broth and chopped chicken. If you have eggs on hand, you can slice a hard boiled egg on top to help provide a protein boost.

    It also takes quite nicely to additional vegetables that you have on hand, and I like to add chopped bok choy and shiitake mushrooms to the base if I have them on hand. Any leafy green will serve you nicely here, and if you have some fresh spinach, it’s nice to wilt some on top for the last few minutes of cooking.

    Ingredients
    Olive oil
    4 cups broth (or bullion in water, or just water)
    1/2 c. red lentils
    1-3 cloves garlic, chopped
    1 medium onion, diced
    1 tablespoon turmeric
    Black pepper to taste (the amount is optional, but some is needed to release the healing benefits of the turmeric)
    Salt, to taste
    Any other chopped vegetables as desired for the base
    Chopped chicken, if desired
    Noodles

    Directions
    1. Add olive oil to a heavy pan and heat. 
    2. Add onion, lentils, garlic, and any base vegetables you desire such as ginger, mushrooms, bok choy, or celery. Stir and let simmer for 3-5 minutes, until onion is transparent.
    3. Stir in turmeric and black pepper and any other seasonings, 
    4. Stir in broth and bring to a vigorous simmer, adding any meats or vegetables. I like to add carrots here, and this is the time to add potatoes if you’re using them. Simmer for 10-15 minutes.
    5. Bring to a boil and add pasta. Boil as directed to make sure pasta is cooked through.
    6. Reduce heat and add anything that needs wilting, such as fresh spinach or diced lemongrass. Stir and let wilt, usually three minutes or so.
    7. Serve with whatever toppings you have on hand that seem appealing: a hard boiled egg, or croutons, or just as is.

    Saturday, December 21, 2024

    Pantry: Winter


    The Winter Pantry does a lot of heavy lifting. Most everything that was harvested over the previous year has been used up, and even the shelves for canned goods are probably starting to look a little bare. Dried foods like beans and lentils, and stored grains are going to be a key to the Winter Table. We also want to check on the levels of oils and nuts, as well as see how the stored fruits and vegetables are faring--it might be that the basket of apples needs to be processed before it turns, or that the long-storing winter Kennebecs need a bit more air.

    Now is also the time to check on any of the foods that you put up or put by. Check to see if the seals are still in place, and make a note of how much and how many jars you have. If you were super industrious and put up green beans, corn, tomatoes, pumpkin, sauces, soups, and the like, this shelf can get you through the coming quarter-year; your table will have a splash of summer's light even in the short dark days.

    But even if you have nothing canned and put by, you can still stock your pantry now with some amazing staples that will keep you hale and hearty until the crocuses bloom. Winter is a good time to check the levels of your bulk items and replenish as needed. Buy the amount that makes sense for you family, or split a builk order with others to help boost your purchasing dollar. Check around and see if there is a local cooperative or group that helps buy in bulk, or focuses on locally sourced staples.

    Root vegetables, such as onions, potatoes, and carrots, can often be bought by the bushel (or half-bushel) from local farmers. See if there are any varieties that they purposefully grew for long storage. Even if you don't have super storage varieties, now is a great time to turn apples into apple butter and set up some scraps for apple cider vinegar, or to make a huge batch of apple pie filling and can it. Anything that you can put by now will be a delight in February and March.

    Winter Pantry

    • Olive oil
    • Butter
    • Nuts
    • Grains
      • Long Grain Brown Rice
      • Quinoa
      • Barley
    • Oats
    • Flour (or wheat berries, if you have a mill)
    • Sugar (unprocessed sugar stores better than refined sugar, as well as being better for you)
    • Carrots
    • Onions
    • Potatoes
    • Apples
    • Beans: 
      • Black beans
      • Navy Beans
      • Pinto Beans
    • Lentils
      • Black Lentils
      • French Lentils
      • Red Lentils
    • Split Peas: Yellow or Green, or both (I like both, as they are very different when they cook up)
    • Coffee
    • Tea

    Thursday, December 19, 2024

    Chicken Pot Pie

    Pot Pies are glorious and satisfying at any time of the year.

    Whip up a batch when the harvest is fresh and the days are breezy and long, and enjoy with a glass of fresh milk or lemonade for a perfect summer dinner with family and friends.

    But pot pies really shine in being able to make the most of meats and vegetables that have been in storage, less tender cuts of meat, and anything that might have been overlong in the freezer. 

    Making a pot pie is really more of a process than a recipe, lending itself nicely to  using anything in the winter storage pantry. I've assembled a list below of various vegtables that take pot pies from good to excellent. The key is to work with what you have and to blend the flavors. If you've harvested the meat yourself, this is an excellent dish for the older, less-tender birds. 

    Pot pie can make the most of carrots and potatoes, if that's all you have on hand, though I wouldn't want to try to make one without celery, and onion is the key to the broth flavor. Feel free to add turmeric if you'd like to help boost the cold-busting properties.

    This recipe doubles and even quadruples well without adding much time to the overall process; make up a whole mess of pies at one time and freeze a few. They go from the freezer to the oven for heating up. 

    Ingredients

    Filling:
    1 pound of chicken, shredded or cubed 
    1 cup chopped carrots 
    1 cups other vegetables, such as frozen peas.
    ½ cup sliced celery
    ⅓ cup butter
    ⅓ cup chopped onion
    ⅓ cup all-purpose flour
    ½ teaspoon salt
    ¼ teaspoon black pepper
    ¼ teaspoon tarragon (or thyme, celery seed, or rosemary, as desired and as available)
    1 ¾ cups chicken broth
    ⅔ cup milk 
     
    Note: Cube the meat before cooking. This helps tenderize it and gives it a quick cooking time. If you're using leftover meat from a previous cooked bird, shredding the meat is fine.  
    Crust:
    2 crusts suitable for deep dish 9" pie plate. Make the crust from scratch  or use premade.

    Equipment

    • Braiser. I like to use a braiser for the filling, but you can use a heavy saucepan or whatever you have on hand that makes sense and has enough room to handle the amount you are cooking.
    • 9-inch Pie plate: This is excellent for deep-dish pies, but shallow works just as well.

    Directions

    1. Preheat the oven to 425F.
    2. Place a crust into a 9" pie plate. 
    3. Make the filling: Combine chicken, vegetables, and celery in a braiser; add just enough water to cover and bring to a boil. Cook for 15 minutes, then remove from the heat and drain. Place mix into the bottom pie shell.
    4. Melt butter in the braiser over medium heat. Add onion and cook until soft and translucent, about 5 minutes. 
    5. Stir in flour, salt, pepper, and spices.
    6. Slowly stir in broth and milk.
    7. Reduce heat to medium-low and simmer until thick, 5 to 10 minutes. Remove from heat and pour over the vegetables in the pie shell.
    8. Cover the pie with the second crust, sealing the edges, and cut away any excess dough. Make several small slits in the top crust to allow steam to escape.
    9. Bake in the preheated oven until pastry is golden brown and filling is bubbly, 30 to 35 minutes. Cool for 10 minutes before serving.
    | 30 minutes prep time | 45 minutes baking and cooling |

    Great Vegetables for Pot Pie

    • More celery
    • More onion
    • Mushrooms
    • Zuchini
    • Summer Squash
    • Eggplant
    • Corn
    • Green Beans
    • Peas
    • Snap Peas
    • Snow Peas
    • Broccoli
    • Cauliflower
    • Potatoes

    Solid additions to pot pies

    These vegetables have a great body, but can change the overall flavor profile of the dish. Use them as you will.
    • Bell Peppers
    • Tomatoes
    • Lima Beans


    Tuesday, December 3, 2024

    Lentils & Potatoes


    Lentils are a staple ingredient around the world. They store well and pack an amazing amount of nutrition. A pound costs less than $3 US; each cup of dried lentils is less than a dollar.

    When combined with the humble potato, they provide a complete protein, meaning the dish contains the full spectrum of amino acids needed to build protein in the body. Lentils and potatoes combine to make an excellent nutrition boost especially for athletes, and teenagers, and bodybuilders. 

    Packed with protein, they are also a fiber powerhouse. Each cup of cooked lentils has 16g of fiber, low calories, and zero cholesterol. If you’re trying to lose weight or improve your health metrics, lentils can be a superpower in your pantry.

    You could live on lentils and potatoes, and the dish is simple enough that it provides a gorgeous base for any seasonal vegetables or meats that you might have on hand. Eaten just as they are, though, they are hearty and delicious, and a testament to simplicity.

    The dish cooks up in one pot, and it scales from one serving to enough to feed an army. It’s done in 30 minutes, which is just about as fast as any food gets. Add anything with Vitamin C to help improve the absorption of the iron. My favorite is a squeeze of lemon over the unadorned dish, or you can add some tomatoes and collards to the recipe below.

    I particularly like a dish of lentils and potatoes during December, when the daylight is short and the there’s an air of expectation along with the chill. Everyone is busy with holiday concerts and gatherings, and on those nights when you can catch an evening to yourself, it’s nice to make a batch of this and enjoy being this cozy, possibly with a book.

    Make a larger batch than you’ll need, as the dish stores well and reheats nicely on the stove or in the microwave, and also can be used as the base of a casserole the next day. Make a half-batch for one serving.

    Ingredients
    1 c. French or green lentils, rinsed
    2 potatoes, any variety, washed and cut into bite sized pieces with the skin on
    3-4 cups water or broth (or water with bullion)
    Herbs as desired. I like a bit of oregano and black pepper.
    Lemon wedge, optional

    Directions
    Combine everything into a 2-3 quart saucepan and bring to a boil. 
    Reduce heat to medium and simmer for 30 minutes.
    Ladle into a bowl, or use a slotted spoon to drain off the broth.
    Spritz the lemon wedge over the dish, if desired.

    Tuesday, November 5, 2024

    Spotlight: Lentils


    They’re the world’s oldest cultivated legume, so it’s no surprise that lentils have become a staple across the globe – from India to the Middle East, Europe, and the Americas.

    They’re the world’s oldest cultivated legume, so it’s no surprise that lentils have become a staple across the globe – from India to the Middle East, Europe, and the Americas.

    Like beans, lentils add a great high-fiber and high-protein element to many meals. Because of their size, lentils cook much more quickly than dried beans and do not have to be soaked before cooking. They are extremely versatile and inexpensive, which makes them an accessible form of high-quality protein. Let’s take a closer look at this convenient staple.


    Preparation, Cooking, and Storage

    Lentils are sold in two forms: canned and dried. While canned are good for ready-to-eat uses such as a quick salad or side dish, the dried version works well for soups and stews, salads, and sides. A bag of dried lentils can really last forever, but they are best used within a year of purchase (or by the date printed on the package). Once the bag is opened, store any remaining lentils in an airtight container and keep them in a cool, dry place.

    One benefit of lentils is that they can be cooked in less than an hour. While it seems like an unnecessary step, don’t skip rinsing your lentils and sifting through them before cooking to remove any stones or debris. It is rare to find stones, but it does happen. When cooking, treat lentils more like pasta than rice – the lentils do not need to absorb every bit of cooking liquid the way rice does, but you also don’t need to completely flood the lentils like you would pasta. As a general rule, one cup of dried lentils yields two to two-and-a-half cups of cooked lentils.

    Because of their rather delicate, earthy flavor, lentils work well in a variety of dishes and in almost any type of cuisine. The best time to add flavor to lentils is during the cooking process. Don’t be afraid to get creative. Adding half an onion (peeled), a few cloves of crushed garlic, a bundle of herbs, or a bay leaf to the cooking liquid and a pinch of salt gives lentils plenty of flavor, especially when they’re the base for a salad or side dish.

    Nutritional Breakdown

    Lentils are an easy, affordable ingredient to add to many meals, and they’re also extremely healthy. One cup of cooked lentils contains around 230 calories, 18 grams of protein, 1 gram of fat, and 16 grams of fiber. When you add this legume to your diet, you can count on:

    • Fiber Lentils are packed with both soluble and insoluble fiber. Foods high in soluble fiber can help stabilize blood sugar and help reduce blood cholesterol. This in turn reduces the risk of heart disease and stroke. Foods high in insoluble fiber are good for digestion and help prevent constipation and other digestive issues
    • Protein Protein helps keep us full and gives our bodies the energy to power through the day. Protein accounts for 26 percent of the calories in lentils
    • Energy Lentils offer a steady, slow-burning source of energy, thanks to the mix of fiber and complex carbohydrates
    • Folate One cup of cooked lentils provides 90 percent of the daily recommended intake of folate. This B vitamin helps the body build new cells, an essential task that’s incredibly important for pregnant women, and has also been shown to help prevent some types of cancer
    • Vitamins and Minerals Lentils are rich in a number of vitamins and minerals. The magnesium in lentils helps the body transport oxygen and nutrients more effectively by improving blood flow. And iron helps move oxygen throughout the body
    • Heart Health The mix of fiber, folic acid, and potassium in lentils makes them a heart-healthy choice

    Lentil varieties

    There are four main categories of lentils: brown, green, red/yellow, and specialty.

    Brown Lentils

    Brown lentils are the most common variety – any bag in the grocery store that says “lentils” without any other descriptor is most likely full of brown lentils. This variety can range in color from khaki brown to dark black and has a mild, earthy flavor.

    Good For:

    This variety holds its shape well during cooking, making it ideal for use in warm salads, casseroles, soups, and stews. Brown lentils also work well in veggie burgers or vegetarian meatloaf.

    To Cook:

    In a medium pot, combine 1 cup dry brown lentils with 2½ to 3 cups of water. Bring to a boil and then simmer for 35–45 minutes until tender. If they will be used in a soup or stew, add them to the pot with about 40 minutes cooking time left.

    Green Lentils

    Green lentils are extremely similar to brown lentils, but they have a more robust and slightly peppery flavor and come in a range of sizes. Green lentils can vary in color from a pale or spotted green to a green-slate color with hints of blue and black. Pro tip: Green lentils are a great (and less expensive) substitute for the famous French Puy lentils.

    Good For:

    Like brown lentils, green lentils retain their shape well. This, combined with their strong flavor, makes green lentils ideal for salads or side dishes.

    To Cook:

    Combine 1 cup lentils with 2½ cups water. Bring to a boil and simmer 35–45 minutes until tender. (Don’t forget to flavor the cooking water with some aromatics or herbs for a tastier end product.)

    Red and Yellow Lentils

    This variety of lentil ranges in color from golden yellow to orange and red. They are also the only variety sold “split,” meaning they processed into smaller lentil bits. These somewhat sweet and nutty lentils are very common in Indian and Middle Eastern cuisine and are the key to classic dishes such as Indian dhal.

    Good For:

    Because of their “split” nature, this variety of lentil tends to disintegrate when cooked, making them ideal to use in soups or stews (especially as a thickener), and in casseroles or any other dish where they are pureed.

    To Cook:

    Split lentils cook quickly, usually in about 15–30 minutes.2425 When you’re using them in a soup or stew, just add them to the pot with 15–30 minutes left in the cooking time. When cooking them on their own, bring 1½ cups water and 1 cup dry lentils to a boil, then simmer until tender, 10–15 minutes.

    Specialty Lentils

    There are many varieties of specialty lentils, but two are most common: Black beluga and Puy. Both varieties are about one-third of the size of brown or green lentils and have a rich, earthy flavor.

    Black Beluga Lentils:

    When cooked, black beluga lentils are shiny, tiny, and black – they look kind of like caviar: hence their name.

    Good For:

    Thanks to their rich, earthy flavor, soft texture, and beautiful appearance, these lentils make a great base for salads or as a feature with any kind of protein.

    To Cook:

    Combine 2¼ cups water and 1 cup lentils. Bring to a boil and simmer 25–30 minutes or until tender.

    Puy Lentils:

    Puy lentils are grown in the volcanic soil of a specific region in central France called Le Puy. Puy lentils are known for their dark, bluish-slate-green color and rich, peppery flavor.

    Good For:

    These high-quality lentils should star as the center of a meal. They make a great base for meat or fish, or can be easily featured in a side dish or main dish salad.

    To Cook:

    Combine 2½ cups water with 1 cup lentils. Bring to a boil and simmer 20–30 minutes until tender.

    Whether in a salad or soup or as the base of a main dish, lentils make a hearty and healthy addition to any meal. If using a recipe isn’t possible, it’s easy to whip up a tasty lentil-based dish without a lot of direction. Follow the guidelines regarding water to lentil ratio, and add plenty of flavorings to the water itself – an onion (quartered), a bay leaf, or a bundle of other herbs – to flavor the lentils as they cook. Serve with a pan of roasted vegetables and a piece of meat for an easy, complete meal. Lentils easily take the place of any hearty grain or legume in most recipes or cooking applications.


    This food profile was written by Kate Morin, and originally published on Fix.com

    Wednesday, October 23, 2024

    Profile: Butternut Sqash


    Butternut squash is everywhere in Autumn. Farmers Markets have it in a million different sizes, and market baskets are overflowing. It's a great keeper, and a perfect addition to your autumn table, packed with nutrition and easily digested. It makes a beautiful soup, if that's your thing, or can be eaten right out of the shell after roasting. Mashed, it's practically perfect as one of the first table foods to serve to babies and toddlers. 

    My favorite way to cook it is in the slow cooker -- set it whole in the slow cooker on low for 8 hours, remove and cut in half and scoop out the seeds. Dress with a little butter and a dash of salt. As the weather turns chilly, you can set this up in the morning and it's ready to be a star with dinner when you walk in the door. Athletes and after-school club kids have been known to eat a whole one while waiting for the meal to be served, and you can't really go wrong with this as a snack, since it packs so many minerals and nutrients. 

    If you want to cube the squash before roasting, it makes a lovely addition to a kale-based salad. Add some pomegranate arils for an extra boost to nutrition and autumnal goodness. This recipe calls for pecans, which are also just everywhere in the Southeast in autumn, but you could use any nut, really: walnut or pine nut or almond. Skip the nuts if they aren't your thing, or switch to a seed if you have a nut allergy. Pumpkin seeds carry the autumn theme, or sunflower seeds are always a nice choice; both roast well with the Kale salad with squash and pecans recipe below.


    Ingredients
    1/2 small butternut squash, peeled and chopped into 1/2 inch square pieces (about 1 1/2 cups)
    1 tablespoon olive oil or pecan oil
    1/4 teaspoon sea salt
    2 heads kale
    3 pieces thick-cut bacon, optional
    1 tablespoon lemon juice
    1/3 cup pomegranate arils
    Orange Vinaigrette:
    3 tablespoons olive oil or pecan oil
    2 tablespoons orange juice
    1 teaspoon orange zest
    1 tablespoon cider vinegar
    Maple Toasted Pecans:
    1/3 cup raw pecans
    2 tsp olive oil or pecan oil
    2 tsp pure maple syrup
    1/8 tsp ground cinnamon
    Pinch sea salt

    Instructions
    Preheat the oven to 400 degrees F. In a bowl, combine chopped butternut squash, olive oil and sea salt. Stir until combined. Spread mixture on a large baking sheet and roast for 20 minutes, stir, then roast another 5 to 10 minutes, until golden-brown and cooked through. Remove from the oven and set aside to cool.
    While the squash is roasting, add the bacon to a small skillet over medium high heat and cook until it reaches desired level of crisp (about 2 to 3 minutes per side). Place on a cutting board and allow to cool, then chop into pieces.
    Add all of the ingredients for the orange vinaigrette to a small blender. Blend until completely combined (note: you can also whisk the ingredients together in a bowl if you don’t have a small blender).
    In a small skillet, add all the ingredients for the maple-toasted pecans. Cook over medium-high heat for 3 to 5 minutes, or until toasted and sticky, stirring often. Be sure to monitor the nuts closely, as they burn easily.
    Wash, dry, and chop the kale leaves and place them in a large serving bowl. Drizzle with lemon juice and use your hands to massage the juice into the kale leaves for 1 to 2 minutes, until you can feel the kale leaves are more tender.
    Add the pomegranate arils, roasted butternut squash, chopped bacon, and maple-toasted pecans. Drizzle in desired amount of orange vinaigrette and toss everything together to combine. Serve alongside your favorite entrée.

    Nutritional Information
    One cup (205 grams) of cooked butternut squash provides a good source of calcium, iron, phosphorus, and copper as well as:

    Calories: 82
    Carbs: 22 grams
    Protein: 2 grams
    Fiber: 7 grams
    Vitamin A: 457% of the Reference Daily Intake (RDI)
    Vitamin C: 52% of the RDI
    Vitamin E: 13% of the RDI
    Thiamine (B1): 10% of the RDI
    Niacin (B3): 10% of the RDI
    Pyridoxine (B6): 13% of the RDI
    Folate (B9): 10% of the RDI
    Magnesium: 15% of the RDI
    Potassium: 17% of the RDI
    Manganese: 18% of the RDI

    Saturday, September 21, 2024

    Kale Salad with Butternut Squash and Pecans


    Ingredients
    1/2 small butternut squash, peeled and chopped into 1/2 inch square pieces (about 1 1/2 cups)
    1 tablespoon olive oil or pecan oil
    1/4 teaspoon sea salt
    2 heads kale
    3 pieces thick-cut bacon, optional
    1 tablespoon lemon juice
    1/3 cup pomegranate arils
    Orange Vinaigrette:
    3 tablespoons olive oil or pecan oil
    2 tablespoons orange juice
    1 teaspoon orange zest
    1 tablespoon cider vinegar
    Maple Toasted Pecans:
    1/3 cup raw pecans
    2 tsp olive oil or pecan oil
    2 tsp pure maple syrup
    1/8 tsp ground cinnamon
    Pinch sea salt

    Instructions
    Preheat the oven to 400 degrees F. In a bowl, combine chopped butternut squash, olive oil and sea salt. Stir until combined. Spread mixture on a large baking sheet and roast for 20 minutes, stir, then roast another 5 to 10 minutes, until golden-brown and cooked through. Remove from the oven and set aside to cool.
    While the squash is roasting, add the bacon to a small skillet over medium high heat and cook until it reaches desired level of crisp (about 2 to 3 minutes per side). Place on a cutting board and allow to cool, then chop into pieces.
    Add all of the ingredients for the orange vinaigrette to a small blender. Blend until completely combined (note: you can also whisk the ingredients together in a bowl if you don’t have a small blender).
    In a small skillet, add all the ingredients for the maple-toasted pecans. Cook over medium-high heat for 3 to 5 minutes, or until toasted and sticky, stirring often. Be sure to monitor the nuts closely, as they burn easily.
    Wash, dry, and chop the kale leaves and place them in a large serving bowl. Drizzle with lemon juice and use your hands to massage the juice into the kale leaves for 1 to 2 minutes, until you can feel the kale leaves are more tender.
    Add the pomegranate arils, roasted butternut squash, chopped bacon, and maple-toasted pecans. Drizzle in desired amount of orange vinaigrette and toss everything together to combine. Serve alongside your favorite entrée.

    Nutritional Information
    One cup (205 grams) of cooked butternut squash provides a good source of calcium, iron, phosphorus, and copper as well as:

    Calories: 82
    Carbs: 22 grams
    Protein: 2 grams
    Fiber: 7 grams
    Vitamin A: 457% of the Reference Daily Intake (RDI)
    Vitamin C: 52% of the RDI
    Vitamin E: 13% of the RDI
    Thiamine (B1): 10% of the RDI
    Niacin (B3): 10% of the RDI
    Pyridoxine (B6): 13% of the RDI
    Folate (B9): 10% of the RDI
    Magnesium: 15% of the RDI
    Potassium: 17% of the RDI
    Manganese: 18% of the RDI

    Sunday, September 1, 2024

    Oats

    Oats

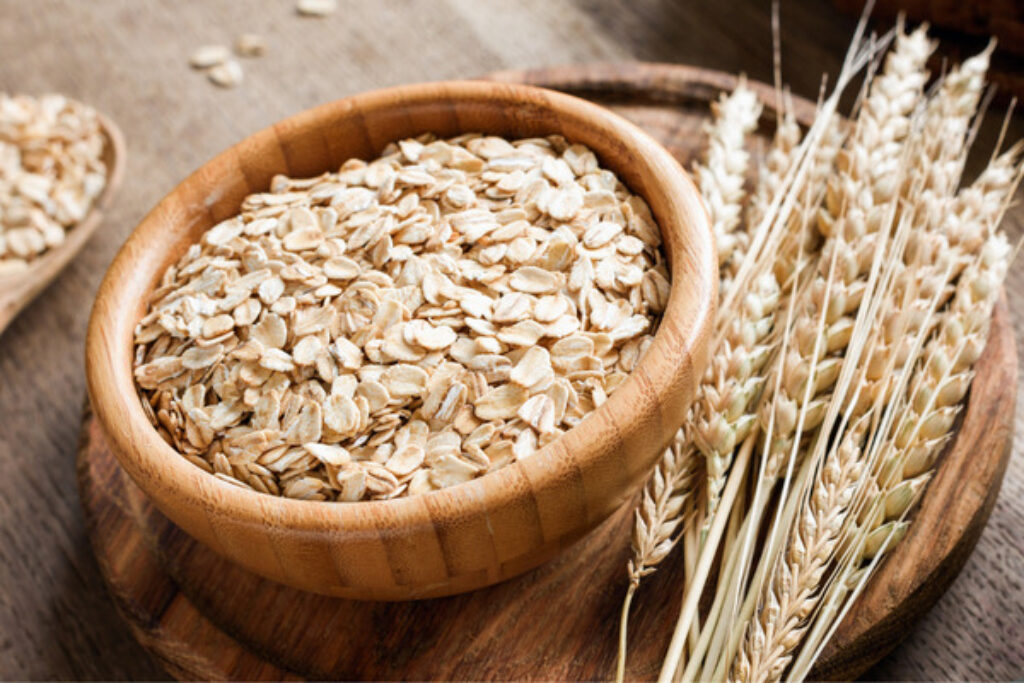
    Oats, a versatile and nutritious grain, have a rich history and offer numerous health benefits. Oats make fantastic meals and desserts, and they are gluten free, extending the grasses-and-grains goodness. They are easy to grow in a wide variety of soils, and take us back to humankind's first storage in silos, a practice that is widely credited with making civilization possible.

    History

    Oats have been cultivated for centuries, with evidence of their use dating back to ancient civilizations. Initially considered a weed, oats eventually gained recognition as a valuable food source. They were particularly important in regions with cooler climates, as oats are more tolerant of cold temperatures than other grains.

    Health Benefits

    Oats are renowned for their exceptional nutritional profile. They are a good source of complex carbohydrates, providing sustained energy. Oats are also rich in dietary fiber, particularly beta-glucan, which has been linked to various health benefits, including:

    • Nutritious: Oats are a good source of protein, fiber, and vitamins B1 and B5. Low in calories, it would take about 40 minutes to burn off the 150 calories from a half-cup dried oats prepared in water.

    • Gluten-free: Oats are a gluten-free grain, making them a popular alternative for those with celiac disease or gluten sensitivity. If you’re allergic to gluten, be sure to purchase certified gluten-free oats to avoid gluten contamination from other grains.

    • Lowering cholesterol levels: Oats don’t have any cholesterol, and they help remove cholesterol that is there. Beta-glucan forms a gel-like substance in the digestive system, which can bind to cholesterol and reduce its absorption.

    • Regulating blood sugar: The soluble fiber in oats helps slow down the digestion of carbohydrates, leading to a more gradual release of glucose into the bloodstream.

    • Promoting digestive health: The fiber content of oats supports regular bowel movements and can help prevent constipation.

    • Supporting heart health: Oats' cholesterol-lowering and blood sugar-regulating effects contribute to overall cardiovascular well-being.

    Frugal

    One pound of rolled oats is 5 (US) cups, or ten batches of ½ cup dry

    I usually buy my oats whole in bulk (hulled, but not yet rolled) and then roll them just before using. They cost about $1.40/pound. I usually calculate oats at $1.50 a pound for easier math, making each half-cup batch cost fifteen cents. Crazy-cheap for a bowl that will sustain you all day and help repair the damage you did the day before.

    Note: Amazon has an 8 pound package of classic Quaker Oats for $8.15, and this seems like an insanely good deal. 


    Preparation

    Oats are incredibly versatile and can be prepared in various ways. My favorite way is to take freshly rolled old-fashioned oats and stir in a little cinnamon (and brown sugar, if you like). Heat milk (2:1 milk:oats, or you can use water) in a pan with a little vanilla. Just as the milk begins to boil, stir in the oats and spices. Simmer for 10-20 minutes, stirring to prevent sticking, until oats are the desired consistency. 

    • Oatmeal: The most common way to enjoy oats is by making oatmeal. Simply cook oats with water or milk until they reach a desired consistency.

    • Overnight oats: For a convenient and no-cook option, soak oats in liquid overnight. They will absorb the liquid and become soft and creamy. A traveler’s delight: a half-cup cup of oats can be put in a wide-mouth container with one cup of fresh water (a splash of lemon juice is also very nice with this) and be ready to eat 12 hours later. Longer soaking isn’t a problem. ½ dry oats+1 c. liquid=2 cups oatmeal.

    • Baking: Oats can be used in a variety of baked goods, such as cookies, muffins, and bread.

    • Granola: Oats are a key ingredient in granola, a popular breakfast and snack food.

    • Oat flour: Oats can be ground into flour and used as a gluten-free alternative in baking.

    No matter how you choose to prepare them, oats are a delicious and nutritious addition to your table.


    Nutritional Information

    One cup of cooked old fashioned oats:

    Calories 150

    Calories from Fat 27

    Total Fat 3g

    Saturated Fat 0.5g

    Trans Fat 0g

    Polyunsaturated Fat 1g

    Monounsaturated Fat 1g

    Cholesterol 0mg

    Sodium 0mg

    Potassium 150mg

    Total Carbohydrates 27g

    Dietary Fiber 4g

    Sugars 1g

    Protein 5g


    Storing Vegetables without Plastic