Wednesday, May 18, 2022

Lemon & Herb Balsamic Vinaigrette

Lemony zip really brings greens to life, but this dressing doesn’t stop there. Drizzle it on asparagus for grilling, on quinoa mixed with white beans and tomatoes, on basically anything that you want to. It’s a little bit of sunshine in a jar.

You’ll want to use the best olive oil you can find for this, as the oil sets the whole tone for the dressing. I really like the nutty smooth flavor of olive oil over other oils. The balsamic vinegar adds a nice sweet note without competing with the zip of garlic and lemon. Use whatever herbs are fresh and seem like a good idea that day. Chives are pictured here, but that’s because they were freshly harvested. You could get equally delicious (and yet quite different) results from basil, oregano, or thyme. This is a really nice use for tarragon, if you have some handy. Hint: Make twice what you think you’ll need, because it really does go quickly.

Ingredients
  • 2 Cloves garlic, peeled and minced
  • Juice of 1 lemon, plus pulp
  • 1/4 cup or so chopped fresh herbs
  • 1/2 teaspoon salt
  • 1 teaspoon-1 Tablespoon cracked black pepper, depending on preference
  • Balsamic vinegar (about 1/4 cup)
  • Olive oil (about a cup)
Directions
  1. Dice the garlic and herbs and place in a glass container. 
  2. Cover with lemon juice and pulp and stir to combine.
  3. Add salt and pepper.
  4. Pour in balsamic vinegar to taste and stir to blend.
  5. Slowly whisk in olive oil to combine.
  6. Let chill.

Monday, May 16, 2022

Storing Vegetables without Plastic


Ahhh, spring! 

That time of year when the garden starts sending out leaves and shoots of every variety! There's a reason that good times are called "salad days." 

For those of us with gardens or CSA subscriptions, storing the weekly harvest can be the most difficult part of the season. Here's a handy reference guide to keeping your lovely produce without plastic (and often without refrigeration):

Always remove any tight bands from your vegetables or at least loosen them to allow them to breathe. 

Artichokes- place in an airtight container sealed, with light moisture. 
Asparagus- place them loosely in a glass or bowl upright with water at room temperature. (Will keep for a week outside the fridge) 
Avocados- place in a paper bag at room temperature. To speed up their ripening- place an apple in the bag with them. 
Arugula- arugula, like lettuce, should not stay wet! Dunk in cold water and spin or lay flat to dry. Place dry arugula in an open container, wrapped with a dry towel to absorb any extra moisture.
Basil- is difficult to store well. Basil does not like the cold, or to be wet for that matter. The best method here is an airtight container/jar loosely packed with a small damp piece of paper inside-left out on a cool counter. 
Beans, shelling- open container in the fridge, eat ASAP. Some recommend freezing them if not going to eat right away.
Beets- cut the tops off to keep beets firm, (be sure to keep the greens!) by leaving any top on root vegetables draws moisture from the root, making them lose flavor and firmness. Beets should be washed and kept in and open container with a wet towel on top.
Beet greens- place in an airtight container with a little moisture. 
Broccoli- place in an open container in the fridge or wrap in a damp towel before placing in the fridge. 
Broccoli Rabe- left in an open container in the crisper, but best used as soon as possible.
Brussels Sprouts- If bought on the stalk leave them on that stalk. Put the stalk in the fridge or leave it on a cold place. If they’re bought loose store them in an open container with a damp towel on top. 
Cabbage- left out on a cool counter is fine up to a week, in the crisper otherwise. Peel off outer leaves if they start to wilt. Cabbage might begin to loose its moisture after a week , so, best used as soon as possible. 
Carrots- cut the tops off to keep them fresh longer. Place them in closed container with plenty of moisture, either wrapped in a damp towel or dunk them in cold water every couple of days if they’re stored that long. 
Cauliflower- will last a while in a closed container in the fridge, but they say cauliflower has the best flavor the day it’s bought. 
Celery- does best when simply places in a cup or bowl of shallow water on the counter.

Celery root/Celeriac- wrap the root in a damp towel and place in the crisper.

Corn- leave unhusked in an open container if you must, but corn really is best the day it’s picked.
Cucumber- wrapped in a moist towel in the fridge. If you’re planning on eating them within a day or two after buying them they should be fine left out in a cool room.

Eggplant- does fine left out in a cool room. Don’t wash it, eggplant doesn’t like any extra moisture around its leaves. For longer storage- place loose, in the crisper.

Fava beans- place in an air tight container.

Fennel- if used within a couple days after it’s bought fennel can be left out on the counter, upright in a cup or bowl of water (like celery). If wanting to keep longer than a few days place in the fridge in a closed container with a little water.
Garlic- store in a cool, dark, place.
Green garlic-an airtight container in the fridge or left out for a day or two is fine, best before dried out. 
Greens- remove any bands, twist ties, etc. most greens must be kept in an air-tight container with a damp cloth- to keep them from drying out. Kale, collards, and chard even do well in a cup of water on the counter or fridge. 
Green beans- they like humidity, but not wetness. A damp cloth draped over an open or loosely closed container. 
Green Tomatoes- store in a cool room away from the sun to keep them green and use quickly or they will begin to color.

Herbs- a closed container in the fridge to kept up to a week. Any longer might encourage mold.

Lettuce- keep damp in an airtight container in the fridge. 
Leeks-leave in an open container in the crisper wrapped in a damp cloth or in a shallow cup of water on the counter (just so the very bottom of the stem has water).

Okra- doesn’t like humidity. So a dry towel in an airtight container. Doesn’t store that well, best eaten quickly after purchase 
Onion- store in a cool, dark and dry, place- good air circulation is best, so don’t stack them.

Parsnips-an open container in the crisper, or, like a carrot, wrapped in a damp cloth in the fridge.
Potatoes- (like garlic and onions) store in cool, dark and dry place, such as, a box in a dark corner of the pantry; a paper bag also works well.
Radicchio- place in the fridge in an open container with a damp cloth on top.

Radishes- remove the greens (store separately) so they don’t draw out excess moisture from the roots and place them in a open container in the fridge with a wet towel placed on top.
Rhubarb-wrap in a damp towel and place in an open container in the refrigerator.
Rutabagas- in an ideal situation a cool, dark, humid root cellar or a closed container in the crisper to keep their moisture in. 
Snap peas- refrigerate in an open container
Spinach- store loose in an open container in the crisper, cool as soon as possible. Spinach loves to stay cold. 
Spring onions- Remove any band or tie and place in the crisper.
Summer Squash- does fine for a few days if left out on a cool counter, even after cut.
Sweet peppers- Only wash them right before you plan on eating them as wetness decreases storage time. Store in a cool room to use in a couple a days, place in the crisper if longer storage needed.
Sweet Potatoes- Store in a cool, dark, well-ventilated place. Never refrigerate--sweet potatoes don’t like the cold.
Tomatoes- Never refrigerate. Depending on ripeness, tomatoes can stay for up to two weeks on the counter. To hasten ripeness place in a paper bag with an apple.
Turnips- remove the greens (store separately) same as radishes and beets, store them in an open container with a moist cloth.

Winter squash-store in a cool, dark, well ventilated place. Many growers say winter squashes get sweeter if they’re stored for a week or so before eaten.
Zucchini- does fine for a few days if left out on a
cool counter, even after cut. Wrap in a cloth and
refrigerate for longer storage. 

How to Store Fruit Without Plastic 
Apples- store on a cool counter or shelf for up to two weeks. For longer storage in a cardboard box in the fridge.
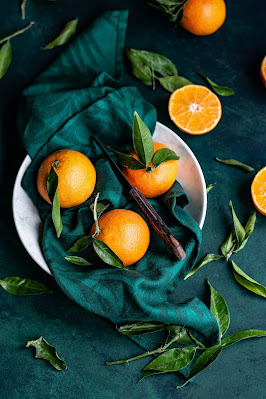
Citrus- store in a cool place, with good airflow, never in an air-tight container. 
Cherries-store in an airtight container. Don’t wash cherries until ready to eat, any added moisture encourages mold.
Berries-Don’t forget, they’re fragile. When storing be careful not to stack too many high, a single layer if possible. A paper bag works well, only wash before you plan on eating them.

Melons- uncut in a cool dry place, out of the sun up to a couple weeks. Cut melons should be in the fridge, an open container is fine.

Peaches(and most stone fruit)- refrigerate only when fully ripe. More firm fruit will ripen on the counter. 
Pears- will keep for a few weeks on a cool counter, but fine in a paper bag. To hasten the ripening put an apple in with them.
Strawberries- Don’t like to be wet. Do best in a paper bag in the fridge for up to a week. Check the bag for moisture every other day.  

Tuesday, April 26, 2022

Cream cheese from scratch


Having made bagels from scratch, I decided to look into cream cheese from scratch. I found a write-up from the prairie homestead, which boldly proclaimed:

LEARNING HOW TO MAKE CREAM CHEESE IS ONE OF THOSE THINGS THAT MAKES YOU FEEL LIKE A HOMESTEADING ROCKSTAR…

And you know I had to try it after that. Bonus, I discovered the whole of prairie homestead, which is a delight. I'm pleased to report that I do, indeed, feel like a homesteading rockstar, especially when using local cream from the milkshare herd.

Ingredients
1 quart cream (or half-and-half). Use the highest quality cream you can find. Fresh from a Jersey cow is best, but any will do.
1/8 teaspoon Mesophilic starter culture
Fine cheesecloth (improvised substitutes)
Sea salt (optional)

Directions
Make sure you are using a glass container to hold your cream. Gently stir in the starter culture.

Loosely cover (not airtight!) and set it on your counter top to culture for 8 to 12 hours. (It may take more or less time, depending on the temperature of your kitchen.)

You’ll know it’s done when it has set up and somewhat resembles yogurt. (It might not be a perfectly even consistency, but that’s ok.)

Dump the thickened cream into the cheesecloth and allow the whey to drip out for at least 12 hours (the longer it drips, the firmer your finished cheese will be).

(Instead of draining the cream at this stage, you could also turn it into cultured butter. Decisions… decisions…)

Once it has reached the desired consistency, scrape it out of the cheesecloth and lightly salt it to taste. The salt is optional, but it will help it keep slightly longer. Store in an airtight container in your fridge– it will get firmer as it chills.

Because it's fresh, it's easy to spread.
Feel free to blend with fresh fruit or cinnamon or other spices if that's your thing.

Monday, April 25, 2022

Quinoa Tabouli


I love tabouli, especially when I use quinoa instead of bulgur as the base. It's refreshing and light, perfect for taking to a potluck, and an all-around amazing side dish whenever the ingredients are available, which is most of the year where I live. Cucumbers, parsley, and grape tomatoes are a staple all summer into early fall. We don't have lemon trees here in the mountains, but everything else is grown in the yard or at a farm nearby. 

If you haven't tried growing quinoa for yourself yet, I highly recommend it! This superfood is super easy to grow, takes very little land, is simple to harvest, and stores like a dream. And it cooks as quickly as pasta! You can even get more than one crop in a season most places if you plan accordingly. The quinoa cooks in the amount of time it takes to prep everything else (less than 30 minutes), and it's gluten free. You can use any quinoa variety, but the darker the color the stronger the flavor. I tend to use red or black quinoa during spring and fall, and use white when it's blisteringly hot out. But they're all just great.

Note: This recipe, which is really more of an assembly, scales beautifully. Need to feed an army? Just multiply! Need to make a smaller batch? Divide in half and enjoy.

INGREDIENTS
1 cup dried quinoa, any color
1-2 cucumbers, diced 
1 pint grape tomatoes or cherry tomatoes, diced
1 teaspoon fine sea salt, divided
1-2 medium bunches parsley
1 bunch mint (I use a hearty amount, but technically the mint is completely optional. Use as much as makes sense to you for you taste.)
3-4 scallions, or red onion if you're out of scallions, thinly sliced
⅓ cup extra-virgin olive oil
1 lemon, juiced and strained for seeds
1-2 medium cloves garlic, pressed or minced 

INSTRUCTIONS
  1. Fill a saucepan with 1.75 cups cool water. Stir in the quinoa and heat to boiling, then reduce to a simmer and cover, simmering for 15 minutes. Remove from heat and remove cover, letting it stand for another ten minutes or so. Fluff with a fork.
  2. While the quinoa is cooking, dice the cucumber and tomatoes. Combine the diced cucumber and tomato in a medium bowl with ½ teaspoon of the salt. Stir, and let the mixture rest for at least 10 minutes, or until you’re ready to mix the salad.
  3. To prepare the parsley, cut off the thick stems. Then, finely chop the parsley and remaining stems, transferring the chopped parsley to a large serving bowl before proceeding with the next.
  4. Add the chopped mint and onion to the bowl with the parsley.
  5. Strain off and discard the cucumber and tomato juice that has accumulated in the bottom of the bowl (this ensures that your tabouli isn’t too watery), and add the strained cucumber and tomato to the bowl.
  6. In a small measuring cup or bowl, whisk together the olive oil, lemon juice, garlic, and remaining ½ teaspoon salt. Pour it into the salad and stir to combine. Taste, and adjust if necessary—add more lemon juice for zing, or more salt for more overall flavor.
  7. Gently fold the vegetables and herbs together, then fold in the quinoa until combined.
  8. You can serve it immediately but it really benefits from an hour or more for the flavors to blend. I like to chill it in the fridge, covered, for at least an hour.
  9. Tabouli will keep well in the refrigerator, covered, for up to 4 days, or so I hear. Mine is always gone before I can blink.
  10. Perfect for taking to a pot luck!

Sunday, April 24, 2022

Chicken and Dumplings


There’s nothing quite as satisfying as a dish of Chicken and dumplings. The dumplings can be used with leftover roasted chicken and vegetables to make a second delightful, hearty, satisfying dinner. This is also perfect for stretching a small amount of meat and vegetables without resorting to a more traditional stew or the ubiquitous soup. If you raise your own hens, simmering is the perfect way to serve the meat, leaving it tender and letting all the flavor have a chance to develop. If you want to get the truest flavor from the simmer, let it cool to rom temperature after cooking.

Time saving option that doesn’t sacrifice flavor: Put the vegetables and chicken in a crock pot on low for 6-8 hours (high for 4-6).  Debone the chicken and set everything from the crock pot in the stock pot that you will use to finish the recipe on the stovetop. Place stockpot in the refrigerator if making this step the day before. I like to measure and mix the dry ingredients for the dumplings ahead of time and then all that left is to whip up the dumplings while the chicken comes up to temperature.


INGREDIENTS
Chicken & Stock:
1 whole chicken
4 cups chicken broth
2 cups water
2 teaspoons salt
1 teaspoon pepper
1 teaspoon garlic powder
1 bay leaf (optional)
1/3 cup butter
1 cup finely diced celery
1 cup finely diced carrots
1 medium onion, diced
1/3 cup flour
Dumplings:
1 1/8 cups milk
6 tablespoons butter, melted
3 cups all-purpose flour
2 tablespoons baking powder
1 teaspoon salt
1/4 teaspoon pepper
1/4 teaspoon dried thyme

INSTRUCTIONS
Cook Chicken & Prepare Stock:
  1. Add chicken, broth, water, salt, pepper, garlic powder and bay leaf to a wide stock pot or dutch oven. Cover then bring to a slow simmer over medium heat. Once broth is bubbling, reduce heat to low then cook, covered, for 2-3 hours, or until legs and thighs are pulling apart from the body and the chicken is very tender. See notes.
  2. Remove chicken from broth; set aside. Strain broth into a large bowl or pitcher, discarding bay leaf and loose bones or skin; set broth aside.
  3. Melt butter in the (now empty) pot then cook celery, carrots and onion over medium heat for 10 minutes. Add flour, stir well, then continue cooking for 5 minutes.
  4. Slowly stir reserved broth in with vegetables. Continue stirring until completely smooth. Reduce heat to low and cover.
  5. Remove skin and bones from chicken then shred or cut chicken into bite-sized pieces.
  6. Prepare dumplings.
  7. Heat pot with broth over medium-high heat until it starts to boil. Add chicken. Gently drop dumplings, one at a time, into gently boiling broth. Take care to drop dumplings away from other freshly dropped dumplings as they will stick to each other before they have a chance to cook.
  8. Once all of the dumplings are in the pot, sprinkle with additional pepper then cover pot. Reduce heat to medium-low then allow to cook for 10 minutes or until dumplings are cooked through.
  9. Serve immediately.
  10. Prepare the Dumplings:
  11. Place milk (1/8 cup is 2 tablespoons) in a wide, shallow bowl in the freezer for about 10 minutes to chill. 
  12. Melt the butter then set aside.
  13. Combine flour, baking powder, salt, pepper and thyme in a mixing bowl then whisk to combine; set aside.
  14. Slowly drizzle melted butter into chilled milk, stirring with a fork until combined. The mixture should look like curdled milk or cottage cheese.
  15. Add milk mixture to flour mixture then stir with a spoon or rubber spatula until just combined.
  16. If making Drop Dumplings: scoop portions of dough with two teaspoons or use a cookie scoop (I used a 1” cookie scoop in the ones pictured here) then drop into gently boiling broth.
  17. If making Rolled Dumplings: Turn dough out onto lightly floured surface then sprinkle with more flour. Roll into desired thickness (anticipate they will double in thickness when cooked). Cut into squares or rectangles (however your nana did it) then drop into gently boiling broth.

NOTES:

  • You can absolutely cook the chicken faster than the directions but the secret to tender, flavorful chicken and delicious stock is to slowly bring everything to temperature and to never allow it to reach a full, rolling boil. 
  • Bone-in, skin-on chicken breasts or thighs can be substituted but I don’t recommend boneless, skinless chicken. If you simply must use them anyway, omit the water and broth then use chicken stock instead and add a stick of butter. Or consider adding 6 chicken legs or wings to flavor the stock.
  • Drizzling melted butter into ice-cold milk will separate the butter into little fat globs. This accomplishes the same thing as cutting the butter into the flour as if making biscuit dough. We want the dumplings to be as tender and delicious as homemade biscuits. 
  • The dumplings will continue to soak up the broth the longer they sit. If you plan on making this ahead of when you will be serving it, consider preparing with 8 cups of chicken broth (rather than 4 cups broth and 2 cups water).
  • If you don’t love the idea of the finely chopped vegetables, feel free to just rough-chop a few carrots, stalks of celery and an onion then throw them in the pot when the chicken cooks. If you decide to do it this way, still cook the butter and flour for 5 minutes over medium heat. This just makes a little roux to thicken the stock a bit. You’ll see a lot of recipes that call for a can of Cream of Something soup – this is the homemade equivalent to that.
  • For an especially Southern spin on Chicken & Dumplings, add several sliced boiled eggs after adding the dumplings.

Sunday, May 15, 2016

Basil

Today I sowed the basil seeds. We are supposed to have chilly weather tonight, but I think it will all be good, and that we can probably count May 15 as the Last Frost Date, which is weirdly in accordance with the estimation that I use for my zone. My friend asked how much basil to plant for a person, and that is a tricky equation. Some folks use less than a single, small herb pot plant for the whole season, for a whole family, while I can use a garden of the pungent leaves all on my own in a week.

So here's my recommendation:
Start with a single plant. For me, that is nowhere near enough, and I usually end up buying a packet of seeds and planting a row or two. I could harvest it darned near daily. Also, it's a handy plant in the garden. Plant it around tomatoes and it will repel various predators, including deer (nothing is guaranteed when it comes to deer, but they seem to avoid the stinky plants), and it will also keep fruit flies away when the vegetables are harvested. Pick a bowl full of sunshine-ripe vegetables and throw a few leaves of basil over it all to repel the fruit fly. Then, in the kitchen, warm some garlic in some olive oil and tear the basil leaves into the pan. Let it all warm gently while you wash and dice the tomatoes, which you throw into the pot and let simmer until the whole thing is warm, while the water for angel hair comes to a boil in a different pot. By the time the angel hair is ready, the tomato has released its juices and the whole thing is herbalicious. Ladle the tomatoes over the pasta and enjoy!


Monday, January 11, 2016

Soup of the Day: Handfasting Soup

This soup makes use of all the many root vegetables you have on hand and need to use up in the new year. Parsnip, turmeric and garlic help boost the immune system and banish colds. Bonus, any that is left can become the base for golden noodle chicken soup, with all the immune benefits intact.

I didn't know that yellow split pea soup is a Thursday night staple in Sweden; this is a tradition I could adopt, especially now that I know that yellow split peas are a superfood.

Dried split peas, like other legumes, are rich in soluble fiber. They also contain an isoflavone called daidzein, which acts like weak estrogen in the body. The consumption of daidzein has been linked to a reduced risk of certain health conditions, including breast and prostate cancer. Split peas are particularly rich in potassium, a mineral that can help lower blood pressure and control fluid retention, and may help limit the growth of potentially damaging plaques in the blood vessels.

Add parsnips, mother nature's multivitamin, and turmeric, a natural anti-inflammatory substance, and it's no wonder the Swedes eat this all the time.

An excellent companion to basic bread, it's simple, easy fare that will have folks coming back for more.

Ingredients
1 cup dried yellow split peas
3 cups water or broth
Potatoes, parsnips, Daikon radish, databases, turnips, and any other root vegetables that need to get used.
Carrots, diced
Onion, diced
1/4c. Olive oil, plus more as needed
3 - 6 cloves garlic, diced
Celery, diced
1-2 tablespoons dried basil
1 - 2 teaspoons white pepper
1+ tablespoon turmeric powder, as much as you dare to

Directions
In a medium saucepan, bring the three cups of water or broth to a boil. Add the split peas and simmer, covered, for 45 minutes, or until whisking results in a broken down broth.
Meanwhile, in a separate saucepan, cover the root vegetables with just enough water that a few stick out above the water line. Bring the water to a boil, and simmer until the vegetables begin to soften.
In a heavy stock pot, sautee onion, garlic, celery, carrot and spices in oil until onions are transparent. Add more oil if necessary to prevent sticking.

Add softened vegetables to stock pot, including cooking liquid. Add split peas when ready. Stir to mix and let warm through while flavors marry.

Sunday, January 10, 2016

Bagels


These beauties take some foresight and planning, but they are absolutely worth it. And while the recipe is a bit of a task list, nothing is difficult or fiddly - feel free to include chefs of all ages and experience levels. Simply perfect for a Sunday brunch in January. Serve warm with butter, or as a base for a spread involving cream cheese, roast beef, smoked salmon, cheeses and spreads of all kinds. The best part is that most of the work is done the day before. The batch makes 16, and you can season them as you choose before baking. If you are expecting a crowd, double or even triple the recipe; for a weekend batch for two, make half as much. My family and I were thrown by the ingredients in weights, as opposed to volume. I will make a note next time we make it of what volume we used. We made some other changes as well, listed below.

Ingredients
4 cups all purpose flour instead of bread flour
1 tablespoon Barley malt syrup used instead of malt powder

Directions
We made bagels from scratch. We are almost as impressed with ourselves as we are with the results.
Sponge stage. We set this up in a few minutes and then went to the gym and went to a movie (All the King's Men - it was pretty good, too).  When we got back, it was perfect and ready to be made into dough. We used the stand mixer, and it was exceedingly simple.

After the dough cures in the refrigerator overnight, the bagels are ready to cook. Step one is boiling in water with a tablespoon of barley malt syrup and a teaspoon of baking soda, one minute on each side.


This is the part Vivian really likes: adding seasoning on top of the boiled dough before baking. Note: the foil was a bad choice. A little vegetable oil on the pan is a better  way to go, or parchment paper if you need to keep the dough off the pan.


Yummy goodness.


Tuesday, December 15, 2015

Chocolate Chip Shortbread

Christmas is a fantastic time for baking, but anytime is a good time for shortbread. This version is so simple and easy, young children can do the whole process, and it's a great way to include them in the kitchen. Shortbread takes on a rich flavor by aging a few days, so make a double batch to set some aside - at our house it's a miracle if there is any left the next day.  If you need a quick hostess gift, whip up a batch and place some bars (or use cookie cutters for shapes, omitting the chocolate chips) in a tin or baker's box lined with parchment paper. Tie a ribbon on it and give with confidence.

1 cup butter, softened
3/4 cup turbinado sugar
2 cups flour
1 cup premium dark chocolate chips
1 tablespoon Madagascar vanilla

Whisk the sugar into the butter until it is creamy. Add half the flour gently using a wooden spoon until combined. Pour the vanilla over the chocolate chips and stir, then add to the batter and fold in. Add the remaining flour and blend.

Bake in a well-buttered 9x12 pan at 350 degrees for 12-15 minutes. It's done when the top is starting to firm and the edges are golden, pulling away a bit from the sides of the pan. Remove and scoreline bars, then let cool before removing.

Tuesday, November 24, 2015

French Onion Soup


There's nothing quite as satisfying as a bowl of French Onion soup on a grey autumnal afternoon. Light a fire in the fireplace while it simmers. It's simple and will warm you through, and onions are reported to boost the immune system, a perfect foil to the season's colds.

One each red, yellow and white onion
Plenty of butter, about a stick or so
1 tablespoon flour
Dash sugar
Tone's beef base
4 cups water

Chop onions and place in a heavy pot. Simmer with butter and beef base until caramelized, stirring often. Once the onions are soft and ready, stir in the flour and sugar and simmer for three minutes or so, to thicken. Add the water and simmer for thirty minutes or more.

Spoon it into a bowl and cover with a slice of French bread and gruyere, then toast in the oven to melt the cheese.

Tuesday, May 26, 2015

Cheesecake


Crust
2 cups (475 ml) of Graham cracker crumbs (from a little less than 2 packages Graham crackers)
2 Tbsp sugar
Pinch salt
5 Tbsp (70 g) unsalted butter (if using salted butter, omit the pinch of salt), melted
Filling
2 pounds cream cheese (900 g), room temperature
1 1/3 cup granulated sugar (270 g)
Pinch of salt
2 teaspoons vanilla
4 large eggs
2/3 cup sour cream (160 ml)
2/3 cup heavy whipping cream (160 ml)
Toppings
2 cups sour cream (475 ml)
1/3 cup powdered sugar (35 g)
1 teaspoon vanilla
12 ounces (340 g) fresh raspberries
1/2 cup granulated sugar (100 g)
1/2 cup water (120 ml)
Special equipment needed
9-inch, 2 3/4-inch high springform pan
Heavy-duty, 18-inch wide aluminum foil
A large, high-sided roasting pan

Prepare the crust
place springform pan on foil wrap first layer of foil around pan
wrap second layer of foil around pan finish wrapping foil
1 Prepare the springform pan so that no water leaks into it while cooking. Place a large 18-inch by 18-inch square of heavy duty aluminum foil on a flat surface. Place the springform pan in the middle of the foil. Gently fold up the sides of the foil around the pan. Make sure to do this gently so that you don't create any holes in the foil. If there are any holes, water will get into the pan and ruin the crust. Press the foil around the edges of the pan. Place a second large square of foil underneath the pan, and repeat, gently folding up the sides of the foil around the pan and pressing the foil against the pan. To be triply safe, repeat with a third layer of heavy duty foil. Gently crimp the top of the foil sheets around the top edge of the pan.
2 Preheat oven to 350°F, with rack in lower third of oven. Pulse the graham crackers in a food processor or blender until finely ground. Put in a large bowl, and stir in the sugar and salt. Use your (clean) hands to stir in the melted butter.
use your hands to press down graham cracker crumbs form even layer of graham cracker crumbs
3 Put all but 1/4 cup of the graham cracker crumbs in the bottom of the springform pan. (Save the remaining 1/4 cup for if you happen to have any holes that need to be filled in, either while you are making the crust, or after the cake has cooked and you've unmolded it.) Gently press down on the crumbs using your fingers, until the crumbs are a nice even layer at the bottom of the pan, with maybe just a slight rise along the inside edges of the pan. Be careful as you do this, as not to tear the aluminum foil. Place in the oven for 10 minutes. Remove from the oven and let cool. Reduce the oven temperature to 325°F.
Make the filling
place cream cheese in mixer beat until smooth
4 Cut the cream cheese into chunks and place in the bowl of an electric mixer, with the paddle attachment. Mix on medium speed for 4 minutes until smooth, soft and creamy. Add the sugar, beat for 4 minutes more. Add the salt and vanilla, beating after each addition. Add the eggs, one at a time, beating for one minute after each addition. Add the sour cream, beat until incorporated. Add the heavy cream, beat until incorporated. Remember to scrape down the sides of the mixer bowl, and scrape up any thicker bits of cream cheese that have stuck to the bottom of the mixer that paddle attachment has failed to incorporate.
Cook the cheesecake
place pan in high sided roasting pan pour cheesecake filling into pan
place pan on roasting rack in oven pour hot water into roasting pan to create a water bath for the cheesecake
5 Place the foil-wrapped springform pan in a large, high-sided roasting pan. Prepare 2 quarts of boiling water. Pour the cream cheese filling into the springform pan, over the graham cracker bottom layer. Smooth the top with a rubber spatula. Place the roasting pan with the springform pan in it, in the oven, on the lower rack. Carefully pour the hot water into the roasting pan (without touching the hot oven), to create a water bath for the cheesecake, pouring until the water reaches halfway up the side of the springform pan, about 1 1/4 inches. (Alternatively you can add the water before putting the pan in the oven, whichever is easier for you.) Cook at 325°F for 1 1/2 hours.
6 Turn off the heat of the oven. Crack open the oven door 1-inch, and let the cake cool in the oven, as the oven cools, for another hour. This gentle cooling will help prevent the cheesecake surface from cracking.
7 Cover the top of the cheesecake with foil, so that it doesn't actually touch the cheesecake. Chill in the refrigerator for a minimum of 4 hours, or overnight.
Prepare sour cream topping
8 Place sour cream in a medium sized bowl, stir in the powdered sugar and vanilla, until smooth. Chill until you are ready to serve the cake.
Note that this recipe produces enough sour cream topping for a thick topping and some extra to spoon over individual pieces of cheesecake, if desired. If you would like a thinner layer of topping and no extra, reduce the sour cream topping ingredients in half.
Prepare the raspberry sauce
crush raspberries and sugar in small saucepan heat and whisk raspberries
9 Place raspberries, sugar, and water in a small saucepan. Use a potato masher to mash the raspberries. Heat on medium, whisking, about 5 minutes, until the sauce begins to thicken. Remove from heat. Let cool.
Prepare the cake to serve
run blunt knife around edge of pan to separate cheesecake from pan remove springform pan from cheesecake
spread top of cheesecake with sour cream cheesecake is ready to serve
10 Remove the cake from the refrigerator. Remove the foil from the sides of the pan, and place the cake on your cake serving dish. Run the side of a blunt knife between the edge of the cake and the pan. Dorie recommends, and we've done with success, that you use a hair dryer to heat the sides of the pan to make it easier to remove. Open the springform latch and gently open the pan and lift up the sides. Spread the top with the sour cream mixture. Serve plain or drizzled with raspberry sauce.
Print
Hello! All photos and content are copyright protected. Please do not use our photos without prior written permission. If you wish to republish this recipe, please rewrite the recipe in your own unique words and link back to the source recipe here on Simply Recipes. Thank you!
Recipe adapted from Dorrie Greenspan's Baking: From My Home to Yours. Used with permission from author.

Read more: Baking: From My Home to Yours

Storing Vegetables without Plastic